What is Math 10?
Importance of Math 10 in High School Curriculum
Math 10 is a critical component of the high school curriculum, providing students with essential mathematical skills and reasoning abilities. It acts as a bridge between elementary math and advanced courses, ensuring a smooth transition. The course emphasizes problem-solving, logical thinking, and practical applications, which are vital for academic success. Math 10 prepares students for higher-level math, science, and technology courses, making it indispensable for STEM-related fields. It also fosters critical thinking and analytical skills, beneficial for everyday decision-making. Understanding these principles is crucial for future academic pursuits and real-world applications.
Overview of the Math 10 PDF
The Math 10 PDF is a comprehensive guide designed to support students in mastering foundational mathematical concepts. It covers algebra, geometry, trigonometry, and data analysis, providing detailed explanations and examples. The PDF is structured to align with curriculum requirements, ensuring clarity and accessibility. It includes practice problems, step-by-step solutions, and key formulas to reinforce learning. This resource is ideal for both classroom use and self-study, offering a thorough understanding of essential math principles. Its organized format and clear language make it an invaluable tool for students aiming to excel in Math 10 and beyond.
Core Concepts in Math 10 include algebra, geometry, trigonometry, and data analysis, forming the backbone of mathematical understanding and problem-solving skills essential for advanced studies.
Algebra and Equations form a fundamental part of Math 10, focusing on solving linear and quadratic equations, graphing, and analyzing functions. Students learn to manipulate and simplify expressions, solve for variables, and interpret results. Understanding these concepts is crucial for higher-level mathematics and real-world problem-solving. Emphasis is placed on systems of equations and their applications in modeling various scenarios. Mastering algebraic techniques builds a strong foundation for advanced math studies and enhances logical reasoning skills.
Geometry and Measurement in Math 10 introduces students to fundamental concepts such as points, lines, and planes. It explores properties of angles, triangles, and polygons, emphasizing spatial reasoning and problem-solving. Students learn to calculate surface area and volume of various shapes, applying mathematical formulas to real-world scenarios. This section also covers measurement units and conversions, ensuring a strong understanding of geometric principles and their practical applications in fields like construction and engineering.
Trigonometry Basics in Math 10 introduces students to the fundamental concepts of angles, triangles, and trigonometric functions. It explores the relationships between angles and sides in right-angled triangles, defining sine, cosine, and tangent. The section emphasizes understanding the unit circle and its connection to trigonometric identities. Practical applications in fields like physics and engineering are highlighted, demonstrating the relevance of trigonometry in solving real-world problems. This foundational knowledge prepares students for advanced math and science courses, fostering critical thinking and problem-solving skills.
Data Analysis and Probability in Math 10 focuses on collecting, organizing, and interpreting data to draw meaningful conclusions. Students learn to identify types of data, create visual representations like histograms and scatter plots, and calculate measures of central tendency such as mean, median, and mode. The section also introduces basic probability concepts, including experimental and theoretical probability, and explores simple probability distributions. These skills are essential for making informed decisions in real-world scenarios, fostering analytical thinking and problem-solving abilities.

Algebra in Math 10 explores variables, equations, and expressions, focusing on functions and their graphs. It builds problem-solving skills and critical thinking for real-world applications.
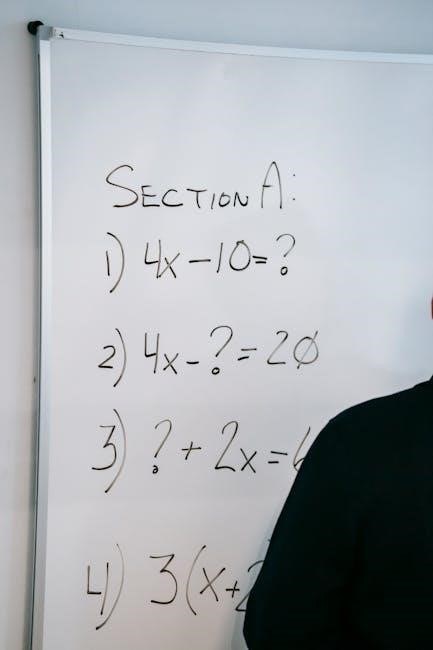
Solving Linear Equations
Solving linear equations is a fundamental skill in Math 10, focusing on simplifying expressions and isolating variables. Students learn to apply inverse operations and properties of equality to find solutions. Graphical interpretations and real-world applications are emphasized to deepen understanding. This section builds a strong foundation for advanced algebra and problem-solving, fostering critical thinking and analytical skills essential for future math courses.
Quadratic Equations and Inequalities
Quadratic equations involve second-degree variables, typically solved by factoring, completing the square, or using the quadratic formula. Students explore ax² + bx + c = 0, analyzing roots and discriminants. Quadratic inequalities extend this, requiring understanding of sign changes and interval solutions. Graphical interpretations highlight parabolic shapes and vertex analysis. These concepts are crucial for modeling real-world phenomena, such as projectile motion and optimization problems. Mastery of quadratics enhances algebraic manipulation skills and prepares students for advanced math topics like calculus and engineering applications.
Functions and Their Graphs
Functions are relations where each input (x-value) corresponds to exactly one output (y-value). Students learn to identify and graph various function types, including linear, quadratic, and absolute value functions. Key concepts include domain, range, intercepts, and transformations. Understanding function notation and inverse functions is emphasized. Graphing techniques illustrate how functions behave, such as increasing, decreasing, or constant rates of change. This foundational knowledge is critical for analyzing real-world relationships and solving problems in science, engineering, and economics. Mastery of functions is essential for advancing in mathematics.
Systems of Equations
A system of equations consists of two or more equations with the same variables. Students learn to solve these systems using substitution, elimination, or graphing methods. Understanding how to analyze and solve systems is crucial for modeling real-world problems, such as budgeting or engineering designs. Graphical interpretations help identify solutions, while algebraic methods provide precise answers. Mastery of systems of equations enhances problem-solving skills and prepares students for advanced math courses. Practical applications in science, economics, and everyday scenarios highlight the importance of this concept.

Geometry in Math 10
Geometry in Math 10 explores properties of shapes, angles, and solids. It covers calculations of perimeter, area, surface area, and volume, essential for spatial reasoning and real-world applications.
Points, Lines, and Planes
Points, lines, and planes are fundamental concepts in geometry. A point represents a location in space, while a line extends infinitely in two directions. Planes are flat surfaces that extend infinitely. Properties of these elements, such as collinearity, intersection, and parallelism, are explored. Understanding these basics is crucial for analyzing shapes and solving problems involving distance, angles, and spatial relationships. These concepts form the building blocks for more complex geometric principles, enabling students to visualize and work with various figures in a coordinate system. Mastery of these ideas is essential for advanced math and real-world applications.
Properties of Angles and Triangles
Angles and triangles are core elements in geometry. Angles are measured in degrees, with types including acute, obtuse, right, and straight. Triangles are classified by sides (equilateral, isosceles, scalene) and angles (acute, right, obtuse). Key properties include angle sums, triangle inequality, and congruence theorems. The Pythagorean theorem and trigonometric ratios are essential tools for solving triangle problems. Understanding these properties helps in analyzing shapes, calculating lengths, and solving real-world problems involving spatial measurements and structural design. Mastery of these concepts is vital for advancing in geometry and related fields.
Quadrilaterals and Polygons
Quadrilaterals, such as squares, rectangles, rhombuses, parallelograms, trapezoids, and kites, are explored in Math 10. Properties like equal sides, right angles, and parallel sides are emphasized. Polygons, including triangles, pentagons, and hexagons, are studied for their interior and exterior angle sums. Regular and irregular polygons are compared, focusing on symmetry and congruency. Understanding these shapes is crucial for calculating perimeter, area, and solving geometric problems. These concepts are applied in real-world scenarios, such as architecture and engineering, to design and analyze structures effectively.
Surface Area and Volume
Surface area and volume are fundamental concepts in geometry, focusing on the measurement of 3D objects. Surface area calculates the total area of all faces, while volume measures the space inside; For prisms, pyramids, cylinders, cones, and spheres, formulas are derived using base area, height, and radius; These calculations are applied in real-world scenarios, such as construction, engineering, and science. Understanding surface area and volume helps in solving problems like material costs for buildings or fluid capacity in containers, making them essential skills in practical and theoretical mathematics.

Trigonometry in Math 10
Trigonometry introduces essential concepts like sine, cosine, and tangent, focusing on triangle relationships and the unit circle. It provides foundational skills for solving real-world problems in various fields.
Trigonometry explores the relationships between angles and sides of triangles; It introduces key functions like sine, cosine, and tangent, essential for solving problems involving triangles and waves. This section covers foundational concepts, such as understanding angles in degrees and radians, and the unit circle, which is central to trigonometric principles. Students learn to apply these concepts to real-world scenarios, including physics and engineering. The introduction to trigonometry builds a critical skill set for advanced math and science disciplines, emphasizing problem-solving and practical applications.
The Unit Circle and Trigonometric Functions
The unit circle is a fundamental tool in trigonometry, representing a circle with a radius of 1 centered at the origin. It is used to define trigonometric functions like sine, cosine, and tangent. By relating angles to coordinates on the circle, the unit circle provides a standardized way to evaluate these functions. Key concepts include understanding angles in radians and degrees, reference angles, and the periodic nature of trigonometric functions. This section explains how the unit circle simplifies solving trigonometric equations and modeling periodic phenomena, making it essential for advanced math and science applications.
Laws of Sines and Cosines
The Laws of Sines and Cosines are essential tools for solving triangles. The Law of Sines states that in any triangle, the ratio of a side to the sine of its opposite angle is constant. The Law of Cosines extends this by relating all three sides of a triangle to one of its angles, particularly useful for non-right triangles. These laws enable students to find unknown sides and angles, making them indispensable in geometry and real-world applications like engineering and physics. Mastering these concepts is crucial for advanced problem-solving in mathematics.

Data Analysis and Probability
Data Analysis and Probability introduces essential concepts for interpreting and analyzing data, including probability, statistics, and graphical representations, fostering critical thinking and real-world problem-solving skills.
Types of Data and Charts
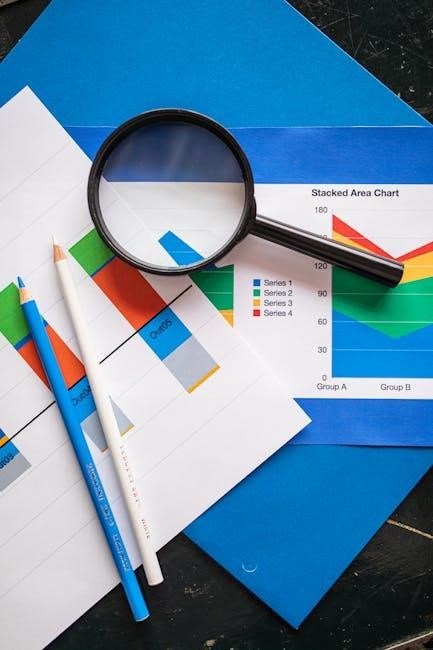
In Math 10, students learn about different types of data, including quantitative and categorical data. Various charts like bar graphs, line graphs, and pie charts are introduced to visually represent data. Understanding these concepts helps in organizing and interpreting information effectively. Students also explore how to choose the appropriate chart type based on the data’s nature. This section emphasizes the importance of clear and accurate data representation, which is essential for drawing meaningful conclusions. Mastering these skills enables students to analyze real-world data confidently and efficiently.
Measures of Central Tendency
Measures of central tendency, such as mean, median, and mode, summarize data by identifying its central value. The mean is the average, calculated by summing all values and dividing by the number of values. The median is the middle value when data is ordered, while the mode is the most frequent value. These measures help describe data distributions and are essential for understanding patterns and trends. Understanding when to use each measure is crucial, as they provide different insights into data. This section in the Math 10 PDF explains their calculations and applications in real-world scenarios.
Probability Basics
Probability basics introduce the concept of likelihood, ranging from certain (1) to impossible (0). Key ideas include calculating probabilities using favorable outcomes over total outcomes. Understanding independent and mutually exclusive events is crucial. The section covers probability rules, such as the addition and multiplication rules, and applies them to real-world scenarios. Students learn to interpret probabilities and make informed decisions. This foundational knowledge is essential for advanced probability and statistics. The Principles of Math 10 PDF provides clear examples and exercises to master these concepts effectively.

Problem-Solving Strategies
Problem-solving strategies in Math 10 emphasize logical thinking, systematic approaches, and efficient solutions. These skills enhance critical thinking and mathematical reasoning abilities effectively.
Step-by-Step Problem Solving
Step-by-step problem solving is a systematic approach to tackle mathematical challenges. It involves defining the problem, gathering information, planning a strategy, executing the solution, and reviewing the outcome. This method ensures clarity and reduces errors. By breaking down complex problems into manageable parts, students can address each component effectively. Regular practice enhances analytical thinking and boosts confidence in applying mathematical concepts. This structured approach is particularly useful in algebra, geometry, and data analysis, fostering a deeper understanding of principles and their real-world applications.
Using Technology for Math Problems enhances learning by providing interactive tools and resources; Graphing calculators, online solvers, and educational software offer visual representations of concepts, aiding in understanding complex equations and relationships. These tools allow students to explore real-world applications, making abstract ideas more tangible. Technology also promotes efficiency and accuracy, enabling quick solutions to intricate problems. By leveraging digital platforms, students can access step-by-step solutions, video tutorials, and practice exercises. This integration of technology not only supports traditional teaching methods but also fosters independent learning and reinforces mathematical principles in a dynamic, engaging manner.
Real-World Applications of Math 10 principles apply to various real-world scenarios, including science, technology, engineering, mathematics (STEM) fields, and everyday budgeting and construction planning.
Math in Science and Technology plays a crucial role in understanding scientific principles and technological advancements. Math 10 concepts like algebra, geometry, and trigonometry are essential in physics, engineering, and computer science. Engineers use mathematical models to design structures, while scientists rely on statistical analysis for research. In technology, programming and algorithms depend heavily on mathematical logic. Data analysis, a key part of Math 10, is vital in interpreting scientific data and making informed decisions. These principles provide a foundation for problem-solving in STEM fields, enabling innovation and practical applications in real-world scenarios.
Math in Finance and Economics relies heavily on algebraic and analytical skills developed in Math 10. Calculating interest rates, budgeting, and understanding investments require a strong grasp of equations and data analysis. Statistics, also covered in Math 10, are essential for interpreting market trends and making informed financial decisions. Additionally, algebraic models help in predicting economic behaviors and forecasting future trends. These mathematical tools prepare students to manage personal finances effectively and understand broader economic principles, making Math 10 a cornerstone for practical, real-world applications in finance and economics.
Exam Preparation Tips involve understanding the format, managing time effectively, and practicing past papers to build confidence and familiarity with common question types.
Understanding the Exam Format is crucial for success. The exam typically includes multiple-choice and open-response questions, covering algebra, geometry, trigonometry, and data analysis. Familiarize yourself with the question types, time limits, and weighting of each section. Reviewing past papers helps identify common question patterns and content emphasis. Knowing the format reduces anxiety and allows you to allocate time effectively during the actual test. Ensure you understand the rules, such as the use of calculators or formula sheets, if permitted. Practicing under timed conditions and reviewing mock tests can significantly improve readiness and confidence.
Time Management During Exams is essential for achieving success. Allocate time evenly across all sections, ensuring you leave a few minutes for review. Start with questions you find easier to build confidence and momentum. Skim through the entire paper first to identify question types and plan your approach. Avoid spending too much time on a single problem—move forward and return if time permits. Use the last 5-10 minutes to check answers and ensure all questions are attempted. Prioritize clarity and accuracy to maximize your score within the given timeframe.
Sample Problems and Solutions provide practice questions with detailed solutions, covering key topics like algebra, geometry, trigonometry, and data analysis. They help students test understanding and improve skills.
The Algebra Practice Questions section offers a range of problems designed to reinforce understanding of key algebraic concepts. Students will find exercises on solving linear equations, quadratic equations, and systems of equations. Additionally, there are questions focused on functions, inequalities, and graphing. These problems are structured to help students apply formulas, simplify expressions, and solve real-world problems. Mixed-practice exercises are included to ensure comprehensive understanding. Detailed solutions are provided for each question, allowing students to review their work and improve their problem-solving strategies. This section is an essential resource for mastering algebraic principles.
The Geometry Practice Questions section provides a variety of problems to help students master geometric concepts. Questions cover points, lines, angles, triangles, and polygons, as well as surface area and volume calculations. Students will practice identifying properties, solving proofs, and applying theorems to real-world scenarios. The exercises include calculations involving Pythagoras’ theorem, trigonometric ratios, and circle theorems. Visual aids like diagrams and charts are included to enhance understanding. Detailed solutions are provided for each question, allowing students to track their progress and refine their problem-solving techniques. This section is tailored to strengthen spatial reasoning and geometric fluency.
The Glossary of Math Terms provides clear definitions for key mathematical concepts encountered in Math 10. It covers algebra, geometry, trigonometry, and data analysis, ensuring students understand fundamental terminology. Terms like variable, angle, function, probability, and trigonometric ratios are explained concisely. This section serves as a quick reference for students to review and reinforce their understanding of essential math vocabulary. By familiarizing themselves with these terms, students can better grasp complex concepts and apply them effectively in problem-solving scenarios. The glossary is an invaluable tool for learning and exam preparation.

Further Resources
Further resources include recommended textbooks, online tutorials, and study guides to supplement learning. Utilize these materials to deepen understanding and excel in Principles of Math 10.
Recommended Textbooks

Recommended textbooks for Principles of Math 10 include “Principles of Mathematics 10” by Nelson and “Mathematics 10” by Pearson. These textbooks provide comprehensive coverage of the curriculum, with detailed explanations, practice problems, and visual aids. They align with the learning outcomes, ensuring a strong foundation in algebra, geometry, trigonometry, and data analysis. Additional resources like glossaries and appendices support understanding of key terms and concepts. Many textbooks are also available in digital formats, offering flexibility for modern learners. Using these resources can enhance comprehension and preparation for assessments.
Online Resources for Math 10
Online resources for Math 10 include websites like Khan Academy, GeoGebra, and Wolfram Alpha, which offer interactive lessons and problem-solving tools. Platforms like Quizlet provide flashcards and practice tests for key concepts. IXL and Coursera feature structured courses and exercises tailored to the curriculum. Many educational websites also offer video tutorials and step-by-step solutions to help students understand complex topics. These resources are accessible anytime, making them ideal for self-study, homework help, and exam preparation. They complement textbooks and classroom learning, ensuring a well-rounded understanding of math concepts.